In an aquarium or fish bowl the fish give off waste, which over a short time breaks down into toxic ammonia. We all know that ammonia is quite dangerous even in small quantities so as aquarists we need to take steps to combat it. In a small Betta bowl that might mean making full 100% water changes every week but what if the tank were larger like 10 gallons or what if it were a body of water like a pond or lake? How do we contend with ammonia in a situation like that? Well, in nature nitrification occurs. This is a natural process where beneficial bacteria consume ammonia and intern creates water conditions safe for aquatic life. In our aquariums we have learned to encourage this bacteria growth and to monitor it so we can recreate a similar ecosystem safe for our fish.
The Old Way
The old way of doing this, and some people still use it, is to set up your tank and add some disposable fish that the aquarist doesn’t care about. For the process to work, ammonia levels first need to build to a level that is unsafe for fish. This is why inexpensive minnows or guppies are used typically. If the fish die during the process it’s no major financial loss to you.
These days’ aquarists are changing their old ways. We now know how to recreate the
How the process works
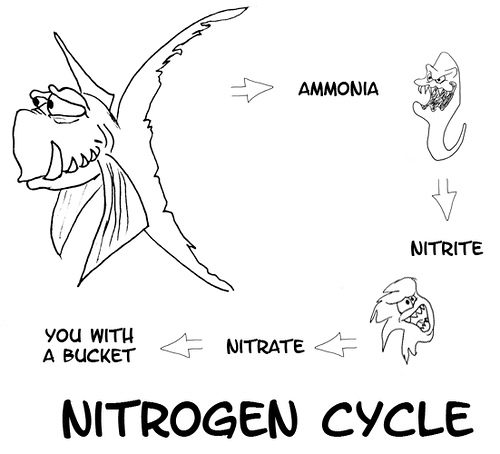
The process begins with ammonia building in the tank. Through the old method, the fish would do their business in the water and that waste would breakdown becoming ammonia. Over the course of several days and weeks the ammonia levels would build. Living naturally in the water, on the tank décor, the substrate and filter media are small nitrifying bacteria called Nitrosomonas. These are the first bacteria we talk about in the nitrification process because they consume ammonia directly. In their small numbers they begin to consume the ammonia as it builds and as long as there is enough ammonia they will continue to reproduce to consume it almost as fast as it’s being created. In the first few weeks the ammonia is created quickly and the numbers of Nitrosomonas are growing…growing…growing. Eventually the bacteria will catch up to the ammonia and will consume as fast as it’s being created. For the first few weeks while you test your water you will see the ammonia levels rising and eventually reaching the point where they spike and then begin to fall as the bacteria consumes it.
These Nitrosomonas also give off a waste product. They expel nitrite. And you may know that nitrite is also a toxin very dangerous to your fish, thought not quite as much so as ammonia. As these Nitrosomonas reproduce, nitrite levels begin to rise until they too reach a level unsafe for your fish. Fortunately, nature has provided a second type of nitrifying bacteria called Nitrospira. Nitrospira consume nitrite. So as the nitrite levels rise the Nitrospira bacteria reproduce in order to consume it all. This second type of bacteria also, like the first, gives off a waste product called nitrate. Nitrate, unlike nitrite and ammonia is much less toxic to fish and can build to much higher levels before they become a problem. The only way to remove nitrate is to perform partial water changes. We usually do that by removing 20% each week and replacing it with clean conditioned tap water.
The New Fishless Method
The Fishless Cycling Method works exactly the same way as the original cycling method only no fish are used. Instead, we buy pure ammonia or ammonia diluted with water at our local grocery store and add it directly to the tank instead of adding fish. There are actually two types of ammonia; there is ammonia hydroxide, which is what you buy at the grocery store. It isn’t as great an option as ammonia chloride because it can affect the pH a little bit and it is also typically diluted with water but we often don’t know how much so how much we add is trial and error. Ammonia hydroxide, however, is very readily available and I have used it many times. Even though it’s not the first choice, it works well and easy to find.
What You’ll Need to Get Started:
– Tank
– Filter & Filter Media
– Air-stone
– Air-pump
– Reverse-flow Valve
– Tubing
– Substrate
– Pure Ammonia
– Eye Dropper
– Salicylate Ammonia Test Kit
– Nitrite Test Kit
– Nitrate Test Kit
– PH Test Kit
– Water Conditioner
– Pen & Paper
Optional
– Filter media or gravel from an established tank.
Part I: Tank Set-up
1. Rinse the substrate and add it to your empty tank. This substrate will house much of the beneficial bacteria that will live in your tank. A rougher substrate like sand or gravel will be a better home to bacteria then smooth large rocks or marbles.
2. Fill your tank with room temperature tap water. Add your water conditioner.
3. Connect your filter. There are many different types of filters on the market and the type you choose depends on the tank size, bioload (or amount of fish waste) and personal preference. Power filters that come with a bio-wheel are nice because the wheel provides additional surface area for beneficial bacteria to cling. The filter media itself will house the majority of all the beneficial bacteria in your tank. You do not want to cycle a tank without a filter nor do you want to keep a filter in an aquarium that you do not intend to cycle. (i.e. 100% water changes instead) Doing so will force your tank to perpetually cycle exposing your fish to toxins repeatedly.
If you plan on using filter media from an established tank, add it at this time. The bacteria you will be culturing is already present in your tank so seeding isn’t needed. Adding the established filter media, however, may dramatically decrease the total time needed to fully cycle your tank.
4. Measure out the amount of tubing you’ll need for the air-stone to reach from the bottom of your tank to the air pump. Connecting the reverse flow valve will ensure that your pump will not accidentally begin siphoning water out of your tank in the event of a power outage. This valve is very inexpensive and can be found near the air stones in most fish stores. Attach the air-stone and place it in your tank. Even though Anabantoids (surface breathing fish) like Bettas don’t require much dissolved oxygen in the water, the beneficial bacteria you are developing will.
5. Now that your tank is all set up it’s a good idea to run the gambit of tests to see what your water parameters are fresh out of the tap without any additives. Record these results. You may find there is already some ammonia present. It is quite common to find up to 0.5 ppm or greater in your tap water.
Part II: Cycling
1. When cycling with fish it is the fish themselves that excrete ammonia which is consumed by the bacteria, but since we are cycling without fish it’s up to us to provide enough ammonia to sustain and encourage growth of the bacteria. Ammonia can be purchased from a grocery store or hardware store. Be sure to check that the ingredients are solely ammonia hydroxide and water. Be sure there are no detergents or artificial colors added to the bottle. If you are unsure, shake the bottle gently. Suds will appear if detergents are present.
2. The potency of ammonia hydroxide depends on the brand you buy and there is no exact quantity to add to your tank water. Unfortunately, trial and error is the only way to determine how much to add. Begin by adding about 3 – 5 drops per gallon of water, allow it to mix for a few minutes and then test your ammonia levels with your salicylate ammonia test kit. You will ultimately want to add enough ammonia to equal the potential bioload. For most simple tank set ups, an ammonia level of about 2.0 ppm will suffice. After testing your water, add enough ammonia to bring it up to the 2.0 ppm level. If it goes a little over that is ok. Retest your ammonia level and record your results.
3. Each day, add enough ammonia to keep the level at about 2.0 ppm. Test your tank for ammonia, nitrite and nitrate each day. Record your results after each test. Check your pH often as well. Any sudden drop or rise in pH can cause your beneficial bacteria to die off and slow or halt your progress. Over the next 1 – 2 weeks the beneficial bacteria that consume ammonia will begin to break down the ammonia you have been adding and will continue to multiply to meet the demand. Those bacteria give off nitrite as a byproduct. Once nitrite begins showing on your tests you’ll know the cycle is well under way.
4. At the point your tests show nitrite levels beginning to raise you can cut the amount of ammonia you add each day by half. As ammonia-consuming bacteria multiply, you will see the ammonia levels drop and nitrite levels rise. A second type of beneficial bacteria that lives in your tank will consume harmful nitrite and then themselves, give off less harmful nitrate as a byproduct.
5. Because of this second type of bacteria, you will then see the nitrite levels drop and the nitrate levels begin to rise. This usually occurs around weeks 3 – 4.
6. Once the ammonia levels fall back to zero, the nitrite levels fall back to zero and the nitrate levels are showing on your tests, then and only then, is your tank completely cycled. Congratulations!
7. At this point you will want to do a partial water change to keep nitrates at a safe level. Usually around 10 – 20 ppm is fine. After this water change treat your water with a conditioner that neutralizes chlorine, chloramines and heavy metals and acclimate your fish. If you don’t have fish right away, be sure to keep adding ammonia daily to keep the cycle going until you are ready.
8. To maintain a safe environment, do partial 25% water changes each week to keep the nitrate levels in the safe range. On occasion, it’s a good idea to test your water for ammonia & nitrite just to make sure the cycle is continuing. Nitrate and pH tests should be performed at least weekly. Once your tank is cycled it can stay cycled for many years with proper maintenance.
Blips in the Cycle
Occasionally your tank may experience a blip in the cycle or may go through a mini-cycle when the ammonia production is not equal with the nitrifying bacterial population. This can happen when you add new fish to the tank and there is suddenly more ammonia being produced then previously or if you perform tank maintenance like replacing your filter media or substrate. In most cases this will correct itself quickly without your ever noticing. Whenever you do observe health problems with your fish it’s recommended to test your ammonia, nitrite and nitrate levels first to see if a cycling problem has occurred.
Why Tank Cycling is Better
Cycling your aquariums provides a significantly more stable environment for your fish greatly reducing the likelihood your fish will contract diseases due to stress. Additionally, the maintenance on a cycled aquarium is a fraction of that required for an uncycled tank. It only needs partial water changes rather than full water changes and water testing can be done far less frequently than in the unstable environment created when a tank has not been cycled. In the end, it’s safer for the fish and a lot less time and money for you.
For more on the Nitrogen Cycle visit Tank Cycling: The Fishless Method
The Nippyfish: A Betta Blog Podcast is brought to you by Switchpod.com
Podsafe music is courtesy of The Podsafe Music Network
Adrienne Pierce performing Beautiful
View Comments (5)
Oh my that was in depth. Thank you so much! I have to say, I am still very new with some of the terminology and will probably need to pester you to explain some of it more in depth. This is all so fascinating. OK, now that I sound like a complete dork…thanks. I have blog rolled you at my blog (a knitting blog) just in case any of my knitterly friends also have bettas. I found your site last night and I have just been enjoying reading all the past posts.
It’s me again…I have another question. Where can you buy “live” food? I keep reading that our pal Ruby needs a varied diet and that live food is preferred but where do I buy it and how do I store it and how long does it last? I am sorry to keep pestering you, but I am so interested in treating our little guy right.
You can try asking your local pet store if they have any live foods for sale (brine shrimp etc) So far, I have been unsuccessful with that.. lol. I was told there was no market for such things, and that they had brine shrimp eggs that I can use to hatch my own :O
I am setting up to start a cycle on a 5.5 gallon tank for a little friend yet to live in it. I was wondering, do I need an airstone and a filter? I got a kit and it comes with a intank filter… but no airstone… is the airstone important?
Christie,
Many thanks for your wonderful articles! I’ve enjoyed reading all of them and have learned SO much.
I am currently trying to cycle a 5 gallon tank for 1 betta and have just learned that our tap water is very high in nitrates (around 80). We’ve always known it had them and have an R/O system for drinking and cooking. I don’t however plan on using it for PWC for the tank as it doesn’t produce water very quickly and would be a real pain.
The only solution I can see is to do the PWC with half tap and half R/O water, to cut the nitrates.
Can you see any other solution to this problem?
Thanks so much for any helpful ideas – so appreciated!!
Kathy