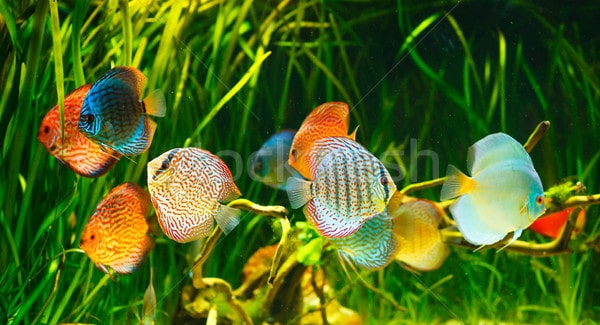
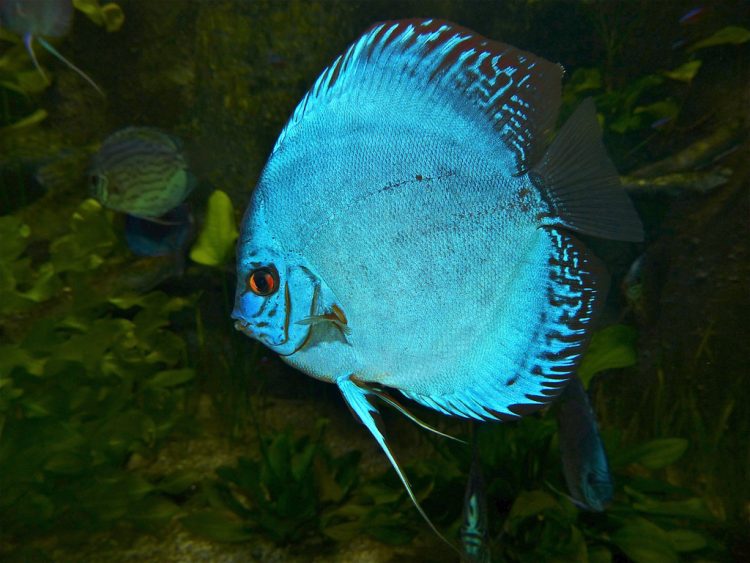
In my short breeding career, I must say that this is probably the most exciting event yet. I gave Discus a try years ago, and due to my inexperience and laziness where maintenance was concerned, it was a miserable failure. Disheartened, it was quite a long time before I had the nerve to try again.

Preparation and environment
In late May 2011 I acquired a group of six blue, turquoise discus and the adventure began. They were about 4 to 5 months old, and 3.5 or so inches in standard length. They were placed in a 90-gallon bare bottom tank, with a cone, and several inverted flowerpots with plastic plants pushed up through the drain holes. Two very large sponge filters in each corner, and a large outside filter supplied filtration. Two heaters were used; one was 200 watts, and the other 100 watts, for a total of 300 watts. The temp was maintained high at first (about 90 degrees) as a precaution because of the stress of moving them. After two weeks of this temperature, I slowly leveled it off to 87 degrees, kept it for another 2 weeks, and finally settled it at 84.3 degrees.
Seapora 59216 Standard Aquarium, 90 gallon
Water composition
This is and always has been a major concern for people working with discus. The preferred water composition (usually) is soft and acidic. Some people go to extremes, with the hardness barely traceable, and a pH of 5.0 to 6.0 (usually with wild stock). Tank raised stock does a bit better with values in the 6.5 to 6.8 range, and the hardness a bit higher. I was a little concerned but not all that much. My tap water measures at 6.8 – 7.0, and a GH of 4 degrees. The fish seemed to find my water compositions acceptable, so I decided not to tinker around with the water chemistry.
Food
This is (in my opinion) one of the areas that cannot be taken lightly when keeping and or attempting to breed these fish. I wanted to put some size on them, and bring them to breeding condition as quickly as possible. Feedings were 3 times per day, and consisted of a variety of foods. These were live blackworms, frozen bloodworms, a homemade paste food, and frozen beefheart. The high protein content of these foods help to put size and bulk on the discus fairly quickly.
Water changes
This is another very important aspect of working with discus. Poor water quality can lead to a variety of problems such as runting, parasite and disease problems, and of course refusal to spawn. The best possible water conditions are an absolute must! My water change program included a water change each day. It is very important to clean any droppings and uneaten food from the bottom of the tank. I did this each evening after the final feeding of the day. This was equivalent to 10 – 15% of the water in the tank. Wednesday and Saturday were reserved for a water change of 50%. My tap water conditions stay pretty steady, so I felt no need to pre-store the water for this, but I did make sure to match the water temperature before topping off my tanks.

Growth and behavior
With the care given the discus put on size rather quickly. By mid-August they had put on about an inch and a half in length, and began to get a nice thickset body. It is a natural discus behavior to create a pecking order and my fish were no exception. Soon after they were introduced to their new home, it began. They would peck at each other’s flanks and fins, and basically harass one another till it was decided who the dominant fish were. I had one rather large male and when food was dropped into the tank he would rush at it. The rest of the fish would scatter and then slowly come back to feed after the larger fish had been feeding for a few seconds. There were others just below him in the order who were not so intimidated, but for the most part he was the dominant fish in the tank.
Spawning
By late August I began to notice signs of an impending spawn. Several of the fish had darkened considerably in color, and were displaying the last 4 stress bars. I kept a close watch on the tank and finally after 4 or 5 days, two fish that had been almost inseparable spawned right in front of me. They made a few practice passes at first, and after the third pass the female began to lay eggs. Just a few at a time at first, but after a few times she began to lay more. The male would stand guard while she did this, and when he fertilized, the female took up his post. I was quite amazed, as I had never seen discus spawn before. Well, as far as I was concerned it was time to get the camera! I snapped half a roll of film or so and then left them in peace. When all was said and done, there were about 75 eggs in a rather haphazard group on the side of a large flowerpot.
Nowremember that dominant male that I was telling you about? Well he was not the one that the female picked for this blessed event and he was none to happy about it! The pair did the best they could, but they just couldn’t fight him off and he was able to eat every egg! All of the other tanks in my house were occupied so I had to improvise. I took a large piece of Plexiglas and fashioned a divider. I had heard that you couldn’t breed discus like this, but my group proved this theory wrong! In fact it worked quite nicely. The pair was on one side and could still see the other fish, so the protective instinct was maintained quite nicely. The next spawn was successful.
Hatching and brood care
The eggs hatched exactly 58 hours after they were laid at a temp of 84 degrees, pH of 6.8 and a hardness of 4 degrees GH. Approximately 75 hours later the babies were grazing off of the parents’ backs. I must say this is perhaps one of the most magical sights I have ever witnessed in any of my aquariums! By this time, the fish had become quite aware of the divider. They all but ignored the other fish and set their minds to the task at hand. They took turns caring for the fry. They male would carry them for a while, and then the female. It was quite interesting to watch them switch. The male would swim up to the female, and the suddenly he would dash out of the cloud of fry. They fry would quickly take their place on the female, and continue to feed. The fry grow and develop quickly on the parents’ slime and nearly doubled in size during this time. After 5 days of this the fry were taking baby brine.
Raising the fry (here comes the work!)
Now you think “well the hard part’s over”, right? Well the battle is only half over my friends! Getting the parents to spawn and carry the fry is a great accomplishment but raising them is another matter entirely!
Baby discus have voracious appetites, and if you expect to keep up with the growth spurts they have at this stage of life, then you will need lots of food, and even more water changes. After 10 days of taking baby brine regularly, the babies were separated from the parents and placed into a 20-gallon high bare bottom aquarium. They were fed live BBS 3 times daily and received a 50% water change each evening before lights out. As they grew so did their quarters and food items. They graduated from the 20 to a 46, and finally, the parents were moved and they were placed back into the 90 gallon tank. At this point they were 5 weeks old and just about an inch in length. They were fed 3 times daily on a rotating basis, with live chopped black worms, frozen bloodworms, frozen and live brine shrimp and a good frozen paste mix. The 50% water changes continued each evening, and on weekends they would get 50% twice per day. I cannot stress enough how important I found the water changes to be to the fry’s growth and health. They are growing fast and metabolizing a lot of food rich in protein, so these water changes, while overkill to some, I found to be quite necessary. The fish grew to approximately 2.5 inch in body size, and were then sold off to various people and pet shops. At this size they are quite stable and should demand a decent price. I raised 3 separate batches of young this way.
Culling
As much as we don’t like to do it, with discus this is a necessary evil. Someone with a good eye for discus knows what they are looking for and defects will be spotted immediately.
Poor Shape: A good discus has a nice round shape. It should not be oval either laterally or vertically. The face should be nicely rounded and not pointed. Where shape is concerned, the above is my opinion. There are some who have different taste, and prefer very high bodies and fins.
Mismatched fins or crossed fin filaments: Sometimes there will be fin deformities, the filaments of the fins can be crossed or mis-shaped. The ventral fins should match nicely, not one longer than the other, nor should either of them be bent.
Eye size: Eyes which are too large in proportion with the body of the fish, are another common thing to look for. This indicates a fish that was not fed properly as it grew or, had some other type of problems during the early growth phase. These fish do develop nice color and may even have nice shape, but most often, they do not grow to the potential size that an adult discus should. These fish are often referred to as “runts”.
Conclusion
When the needs of discus fish are met, breeding is pretty much problem free. I found them to be quite demanding, but definitely worth the effort. My advice to anyone contemplating working with these fish would be to make sure you are committed to what you are doing, and to get the best available stock from the start.


Leave a Reply